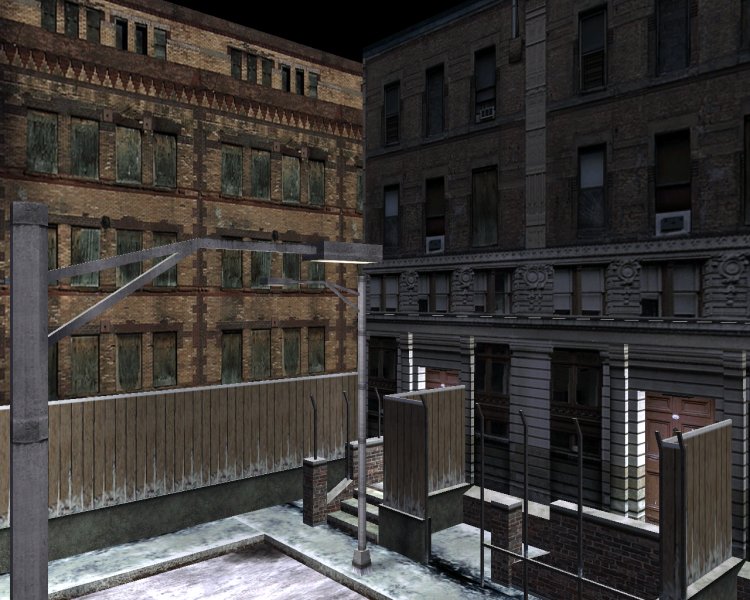
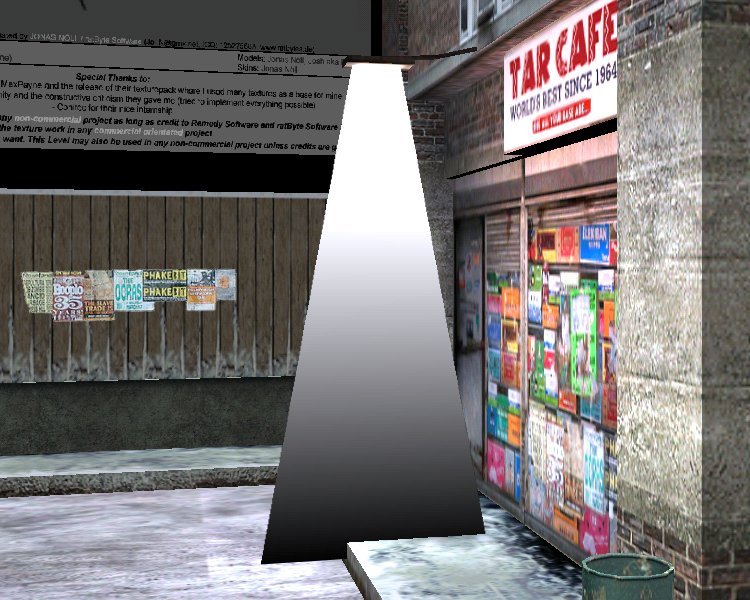
So why do we need these sprites, after all? Let's discuss a practical example:
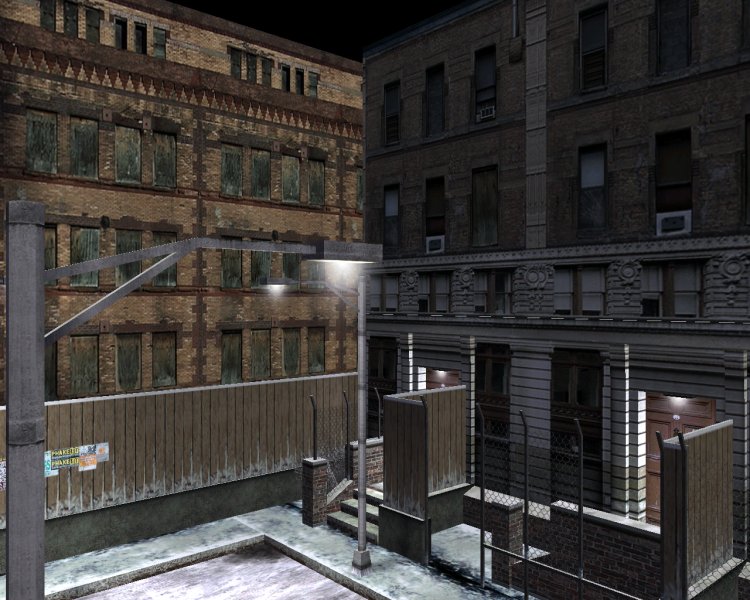
That's a screenshot from a level designed by Jonas Noell during his school internship at Conitec, and I think that it looks pretty good. Now take a good look at the picture below:
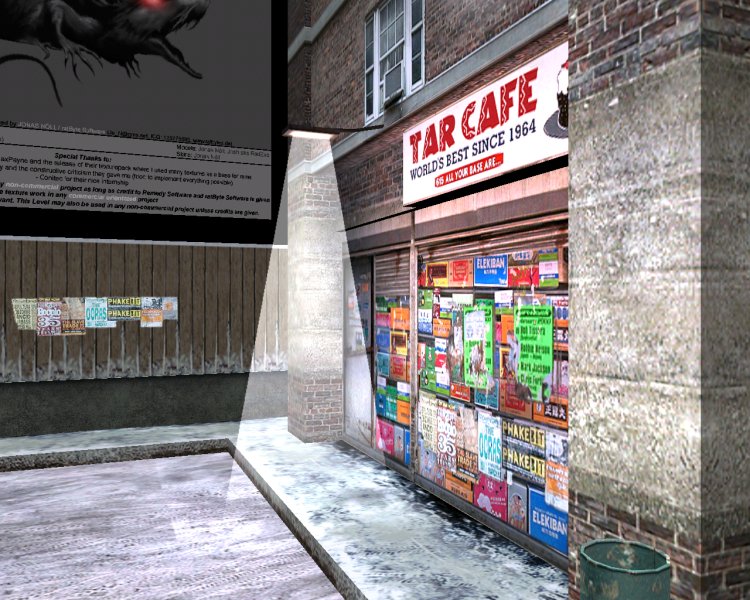
Well, it's the same shot, but some of the magic has disappeared! The fence is gone, the light bulb flares are gone, and even those inscriptions on the left side of the screen are gone now! And yes, you are right; all these level elements were sprites. You can use any painting program to create your sprites; I use Paint Shop Pro because it is pretty cheap and it does its job well, but you can use the more expensive Photoshop, or even the free Gimp. Simply paint your 2D bitmap, save it as a bmp, tga or pcx file, and then add it to your level.
I feel that the artist within me wants to burst out, so fire up your painting program and let's create a sprite right now:
- Start with a 256 x 512 pixels image, using a red background for it:
- Draw 2 black lines (RGB = 000) just like in the picture below:
- Now fill the interior with a metallic gradient:

- Fill the red parts with black (RGB = 000):

- We will add an alpha channel to our sprite; that's a special layer that controls the transparency of our sprite. Select the black areas of the sprite (use the magic wand or a similar tool):

- Invert the selection; only the light beam will be selected now:

- Choose Selections -> Modify -> Contract and contract the selection (the light beam) by 1 pixel; this helps us get rid of the black outlines (if any):
- One more step and we're done. Choose Selections -> Save to alpha channel, and then save your sprite as a tga file.
I will add this sprite to the level, replacing one of the original flare sprites:
It doesn't look that bad, but I can't see through the light beam... let me check the "bright" flag in WED:
The "bright" flag makes the entity look as if it were illuminated by a light source, which is exactly what we need here. You wouldn't think that a single flag would change our sprite that much, would you? I might quit my job as a programmer and start creating sprites for a living instead! :)
Don't forget that you can create oriented sprites and billboards; read the 9th workshop for more information.
![]()
It is now the time to entertain ourselves with some animated sprites; start WED, open work20.wmp and run it using script20.wdl:
That blurred "Acknex rules!" text is an animated sprite with 29 frames; take a look at the logo+29.pcx file inside the \workshop20 folder if you want to see how it looks. Now let's press the "E" key:
We have triggered an explosion! In fact, we have played the animation for the explosion sprite. Shut down the engine and then run the same script file again if you want to trigger another explosion. There are two times of animations:
1) Looped animations;
2) One-shot animations.
An animation is played in a loop if its frames are played more than once. You will want to use a looped animation for a fire effect, or for the signs that hang above the stores in your city, for a monitor that displays all kinds of weird / alien symbols in a loop, and so on. On the other hand, you will want to use a one-shot animation for every sprite that plays its animation frames only once and then stops: an explosion, a teleport effect, and so on. Of course that you can trigger the same one-shot animation several times (for example, to create several explosions) but a looped animation will simply repeat its frames over and over without stopping.
I know, I know... I've talked about these animation frames and you are now wondering what they mean? Let me show you how a bitmap for an animated sprite looks like:
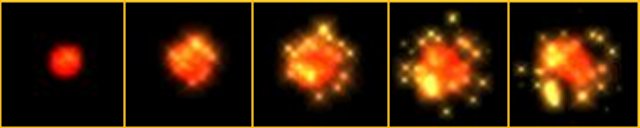
This bitmap has 5 squares = 5 animation frames. The engine will display these bitmaps one by one, starting with the bitmap on the left side of the screen, and moving toward the right side of the screen. If the animation speed is big enough, the player won't notice that he is staring at a bitmapped slide show - he will think that he sees a "real" animation.
So how do you create an animated sprite? Well, you could get some free sprites from Acknex Unlimited, the 3DGS site that offers free resources for game developers, or you could create them in any painting program. Choose the proper size for a frame, and then create several frames and paste them into a single bitmap. If your frame has 128 x 32 pixels and you've got 4 animation frames, the resulting bitmap must have = 512 x 32 pixels, because 512 = 128 x 4, got it? Oh, and don't use those yellow frames that appear in the picture above; I drew them because I wanted you to see where an animation frame begins and where it ends.
You can use as many frames as you like for your animated sprites; please be aware that more frames create better looking effects, but use more memory. A pcx sprite that has 256 x 128 pixels will need 256 x 128 x 2 bytes = 65,536 bytes = 64 Kb. This means that if your sprite has 16 animation frames, it will use about 64 Kb x 16 = 1Mb of video memory.
Don't forget that you can (and you should) use the same sprite or model over and over without trouble, because the memory that is used for it is allocated only once; therefore, it is better to use the same sprite 10 times in your level instead of using 2 different sprites. Well, it all depends on your "system requirements" list.
The last thing to remember for now is the naming convention for sprites. You see, Acknex is a good engine indeed, but it isn't a mind reader device, so it doesn't know what you plan to do with a certain sprite! So it's nice from you to tell it something like this: "Dear Acknex, I'd like you to treat this sprite as an animated sprite, if it is possible! Can you do that for me?" How do you do that? By choosing a proper name for the animated sprite. Here are a few examples:
fire+5.pcx
lightning+32.tga
my_explosion+12.bmp
Do you see what I see? You can choose almost any name for your sprite, but you have to add "+" and the number of frames for that sprite. What happens if I forget to give my animated sprite a correct name? It is treated like a regular, non-animated sprite! See for yourself:

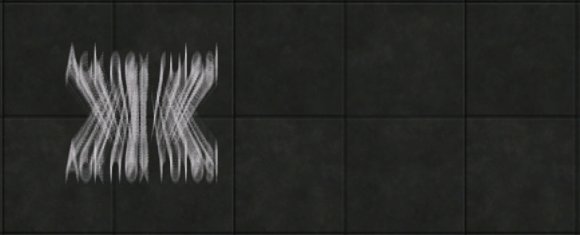
The first picture (WED's side view) shows the same bitmap that was placed in the level using two different names. Once again, I'm using the same bitmap file, but the engine has detected that muzzle+5.pcx is a sprite with 5 animation frames, and has split the bitmap in 5 pieces (5 frames). The second picture shows how these sprites look in the engine; you'll have to trust me that muzzle+5.pcx will behave like an animated sprite, while muzzle.pcx displays all its frames at once. I have added those violet frames in the second picture because I wanted to make the things easier for you; they won't appear if the bitmap doesn't contain them.
You know that we can use pcx, bmp, or tga images for our sprites. They all look the same in your paint program, so what's the difference between them? Well, the engine uses the image format to decide whether to store the images in low quality (16 bits = 2 bytes) or high quality (24 bits = 3 bytes or 32 bits = 4 bytes). Pcx and bmp images are stored in 16 bits; this saves valuable video memory, but it is not recommended for cool transparent effects like explosions or special effects - better use tga files for them.
If you've got this far you might think one of these two things about yourself:
a) You are Einstein's younger brother;
b) You are totally confused, so I'm a lousy teacher.
If you chose b) there's still hope! Allow me to show you the content of the script20.wdl file:
I have used 2 animated sprites here: a looping "Acknex rules!" pcx sprite and a tga file for the one-shot explosion.


What makes a sprite loop-able? There aren't any restrictions for the programmer, but you will want to make sure that the last frame and the first frame are similar (not identical); otherwise, you will see that your animation loop isn't looking too good.
Let's take a look at the action that is attached to the "Acknex rules!" sprite first:
action acknex_loop
{
my.flare = on;
while (1)
{
my.frame += 0.8 * time_step;
my.frame %= 30;
wait (1);
}
}
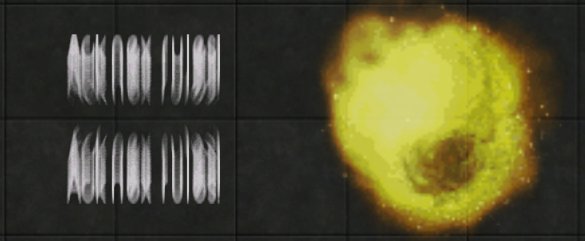
The "Acknex rules!" sprite has its "flare" flag set; this means that its darker areas will become more transparent than the brighter parts, and this makes the sprite look better even if it isn't a tga sprite. See the difference below:
You can see that the black outline that is present in the second picture has disappeared because we have set the "flare" flag on. I'm pretty sure that the "flare" flag will not be used by future engine versions because a) it was implemented for old pcx or bmp files that are stored internally in a low-quality 16 bit color depth, and b) you don't need it when you use tga files for your sprites that are rendered in high-quality 24 or 32 bit color depth. "Flare" is just a quick way to add a low quality alpha channel to a 16 bit image.
Let's get back to our action; "Acknex rules!" plays its animation frames in a while (1) loop, which means that the animation starts running as soon as we start the engine, and ends only when we shut down the engine. We increase the animation frame by adding "0.8 * time_step" to the current animation frame all the time; play with 0.8 if you want to increase or decrease the animation speed.
Even if my.frame grows up to 100, we can't see more than 29 frames, because our bitmap hasn't got more frames, right? That's where the "my.frame %= 30;" line makes itself useful: it limits my.frame in this range: 0...29, allowing the sprite to loop its frames over and over. We have learned about the modulo operator (%) in the 14th workshop; you might want to read that workshop again if you have forgotten how modulo works.
Time to move on to the one-shot animations:
action explosion
{
my.ambient = 100;
my.bright = on;
while (key_e == off) {wait (1);}
while (my.frame < 12)
{
my.frame += 0.7 * time_step;
wait (1);
}
}
The explosion sprite has an "ambient" value of 100 and its "bright" flag set; we had to use these settings because an explosion should look bright, right? This time I have created a tga file, so I didn't need to set the "flare" flag. You can be sure that the explosion effect looks better, because the sprite has got its own alpha channel created in Paint Shop Pro 7.
Let's examine the following line of code:
while (key_e == off) {wait (1);}
This line instructs the engine to wait until key_e ("E" on our keyboard) is pressed. This means that the following loop waits patiently until we press the "E" key:
while (my.frame < 12)
{
my.frame += 0.7 * time_step;
wait (1);
}
This simple loop increases the "frame" parameter for our explosion sprite until frame = 12 (our explosion sprite has only 11 frames). Once again, play with 0.7 if you want to increase or decrease the animation speed. The animation will be played only once, and then it will stop - that's what a one-shot animation is supposed to do!
Let's draw some conclusions:
- looped sprites need a "while (1)" loop;
- one-shot sprites need a "while (my.frame < (number_of_frames + 1))" loop;
- looped sprites need a "my.frame %= (number_of_frames + 1);" instruction inside their "while" loop;
- one-shot sprites don't need the line of code above inside their "while" loop.
I know, you'd like to see some examples now, so here they are:
a) Looped animation, the sprite has 5 frames:
action looped_5
{
while (1)
{
my.frame += 1.5 * time_step; // 1.5 = speed
my.frame %= 6; // 5 animation frames + 1
wait (1);
}
}
b) One-shot animation, 10 frames
action oneshot_10
{
while (my.frame < 11) // 11 = 10 animation frames + 1
{
my.frame += 0.2 * time_step; // 0.2 = speed
wait (1);
}
}
These two examples should serve as skeletons for all your sprite-based
animations and special effects. I encourage you to add funky lines that look
like
the
ones
below:
my.bright = on;
my.transparent = on;
my.ambient = 100;
at the beginning of your actions; feel free to make combinations of these lines and compare the effects.