If you plan to create a flight simulator and you expect it to be sold, you'd better add support for joysticks too! The good news is that the code that allows you to do that is simple. Ok, there's some bad news too: you need to have a joystick if you want to test this workshop. Don't worry if you don't have a joystick yet; you can test this project later, when you get one.
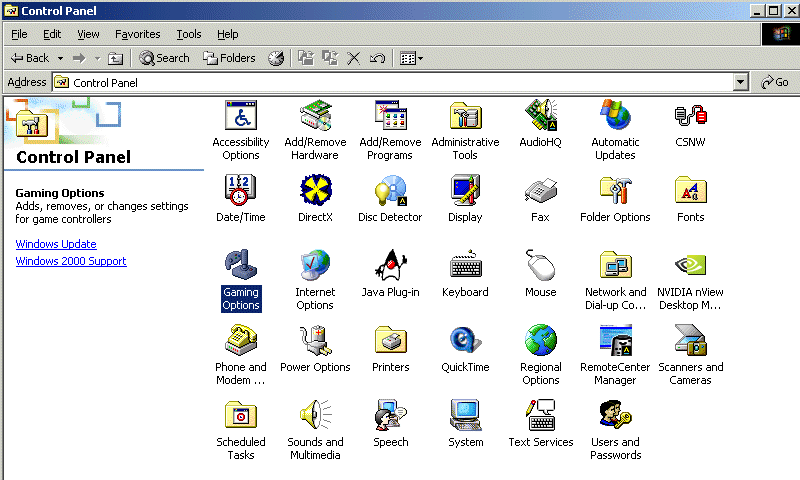
Ok, so how do we get started? First of all, you need to plug your joystick in its corresponding connector, then open Windows' control panel:

That's Windows 2000's control panel so you will see a slightly different picture if you are using a different version of the O.S. Double click "Gaming Options" to open it:

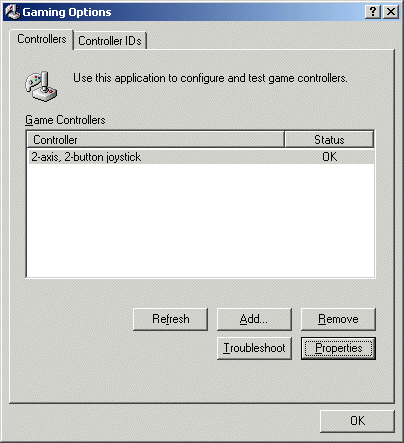
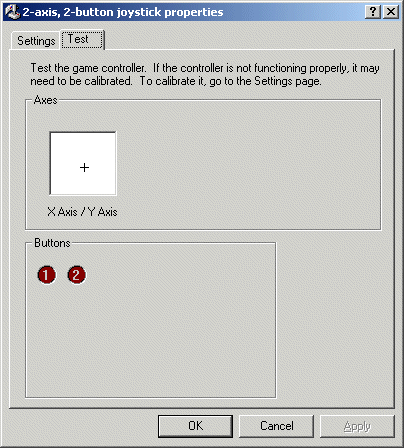
You can see my good old trusty joystick reported as being "OK". Click "Add" to add your joystick if you've never done that before. The installation should be easy and most joysticks will work ok with the drivers that come with Windows. Wait for the installation to finish, click "Properties" and then "Test" and you will see the following window:

This page allows you to set the X and Y axis offset and to test the buttons. Adjust the controls on the joystick until the crosshair is placed close to the center of the white square.
The joystick was set up correctly and you won't need to go through all these settings again until you reinstall Windows. This joystick setup process has nothing to do with the Acknex engine; if you have ever used a joystick you went through all these settings already!
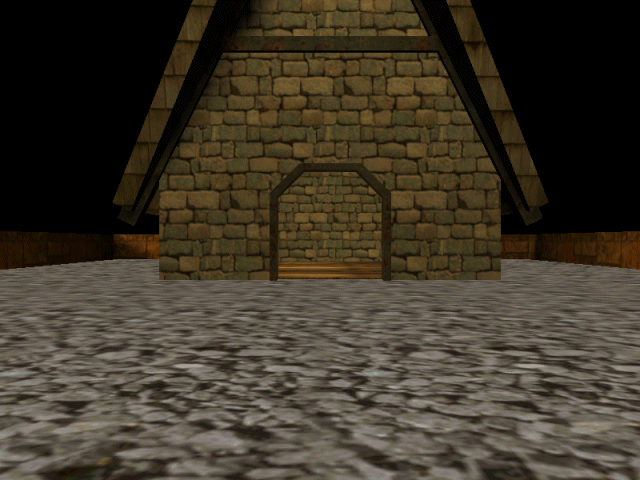
Ok, let's get back to our beloved engine: start WED, open work15, build the level and run it:

It's the same good old house, but this time we can move the camera using the joystick! Use the first joystick button to increase the height of the camera (z) and the second button to decrease it. Press both buttons at the same time to move the camera back to its initial position.
All this stuff sounds pretty complicated, so I expect the code inside the script15 file to be really simple:
////////////////////////////////////////////////////////////////////

var video_mode = 7; // 800x600 pixels

////////////////////////////////////////////////////////////////////

function main()
{
	level_load ("work15.wmb");
	wait (3);
	camera.pan = 90;
	while(1)
	{
		camera.x -= joy_force.x;
		camera.y += joy_force.y;
		if (joy_1 == ON)
		{
			camera.z += 1;
		}
		if (joy_2 == ON)
		{
			camera.z -= 1;
		}
		if ((joy_1 == ON) && (joy_2 == ON))
		{
			camera.x = 0;
			camera.y = 0;
			camera.z = 0;
		}
		wait(1);
	}
}
The code is simple indeed! Let's see what function main does: it loads the level, it waits for 3 frames and then it sets camera.pan to 90 degrees. That's the correct angle that instructs the camera to look at the house and yes, we need that wait (3) instruction because the level needs 3 frames to be completely loaded before changing the camera position and / or angles.
Important tip
Use a wait (3) instruction after level_load in
all your games. This way you can be sure that all the other instructions, actions
or function calls in main are executed properly, after the level
is loaded.
That was the easy part. Let's discuss the code inside the while (1) loop:
while(1)
{
camera.x
-=
joy_force.x;
camera.y
+= joy_force.y;
if (joy_1
== ON)
{
camera.z += 1;
}
if (joy_2
== ON)
{
camera.z -=
1;
}
if ((joy_1
== ON) && (joy_2 == ON))
{
camera.x = 0;
camera.y = 0;
camera.z = 0;
}
wait(1);
}
The previous workshop has taught us about mouse_force.x and mouse_force.y; well, joy_force.x and joy_force.y do the same thing: their values change from -1 to 1 depending on the speed with which we move the joystick. When we don't move the joystick, joy_force.xand joy_force.y are set to zero, so they don't move the camera at all.
I thought that it will be more fun to move the camera (instead of rotating it), so joy_force.x and joy_force.y change the x and y positions of the camera. If you want to reverse the movement directions on the x and y axis of the joystick, replace "-=" with "+=" and / or "+=" with "-=" in one or both lines of code mentioned above.
Do you remember what I've told you when we have studied the keyboard and the mouse? Each key or mouse button has an associated variable that can be set to "ON" if the key / button is pressed. We can check if a certain key is pressed using a single line of code:
if (key_t == ON)
{
//
do some stuff if the "T" key is pressed
}
The same method can be used for the joystick:
if (joy_1 == ON)
{
// do something
}
You won't be surprised to hear that Acknex can control one or two joysticks, each of them having up to 12 buttons. The snippet posted above does something if the first joystick button was pressed.
Ok, so the joystick buttons joy_1 and joy_2control the height (z) of the camera, which is nice, because the joystick itself controls the x and y of the camera, using joy_force.x and joy_force.y. However, the last few lines of code inside the while loop give me a headache:
if ((joy_1 == on) && (joy_2
== on))
{
camera.x =
0;
camera.y =
0;
camera.z =
0;
}
These are the lines of code that move the camera at its initial position (x = 0, y = 0, z = 0) - there's no doubt about that. Wait a minute; this happens when we press both joystick buttons at the same time, so (joy_1 == on) && (joy_2 == on) must mean "joy_1 == on AND joy_2 == on", both joystick buttons are pressed at the same time! Am I smart or what?
Do you remember those nested "if" instructions? They are nothing more than "if" instructions placed inside other "if" instructions.
if (joy_1 == on)
{
if (joy_2 == on)
{
if (joy_3 == on)
{
if (joy_4 == on)
{
// do something when the first four buttons of the joystick are pressed
at the same time
}
}
}
}
Now let's rewrite the ugly code above using the "AND" && operator:
if ((joy_1 == on) && (joy_2
== on) && (joy_3 == on) && (joy_4 == on))
{
// do something
when the first four buttons of the joystick are pressed at the same time
}
I know, I know... The code is cleaner, shorter, nicer, and so on. That's why this "AND" operator was invented and you should use it whenever you can.
If "AND" has impressed you, I've got some more good news: "AND" has a brother named "OR". This "OR" || operator is used when something is true OR something else is true OR... Let's assume that you want to shut down the engine when a certain var named gold is set to 1000 or 2000 or 3000. You could write the code this way:
function some_function()
{
if (gold == 1000)
{
sys_exit(NULL);
}
if (gold == 2000)
{
sys_exit(NULL);
}
if (gold == 3000)
{
sys_exit(NULL);
}
}
What can I say? The code would work ok but the "OR" operator would make it look so much simple:
function some_function()
{
if ((gold == 1000)
|| (gold == 2000) || (gold == 3000))
{
sys_exit(NULL);
}
}
Important tip
If your joystick isn't calibrated properly
the camera can start to spin when you are running a game
(yours or somebody else's project). Unplug the joystick if you don't need it
or make sure that it is calibrated properly.
Important tip
If you are checking several expressions
at the same time (using && or ||) you need to use separate parenthesis
for every expression and another pair of parenthesis that encloses them
all, just like in the example below:
Problem:
If a = 2 and b = 3 shut down the engine.
Solution:
if ((a == 2) && (b == 3))
{
sys_exit(NULL);
}
We are coming close to the end of the workshop
so cheer up! Here's your homework: how would you rewrite the code in script15
if you would want the player to be able to change the height of the camera
(z) using the two joystick buttons OR the "A" (move up) and "Z" (move down)
keys?
Solution: Replace two lines of code
inside function main:
if (joy_1 == on) must be replaced with
if ((joy_1 == on) || (key_a == on))
if (joy_2 == on) must be replaced with
if ((joy_2 == on) || (key_z == on))