An action is a function that can
be attached to an entity: the player, an elevator, a monster, a weapon,
etc. You can attach actions to any entity: model, sprite, wmb entity or
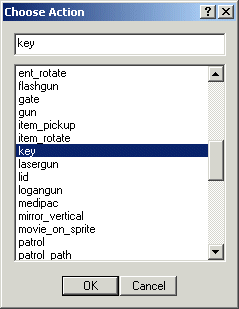
terrain. All the actions created in our scripts appear in WED's action
list, just like in the picture below:

Let's take a look at the differences between actions and functions:
action add_numbers( )
{
b = a + 5;
}
function add_numbers( )
{
b = a + 5;
}
The action and the function look pretty much the same. The only difference is that an action appears in WED's action list above, and can thus be attached to an entity. It begins to run automatically after the level is loaded. A function normally needs to be called if we want it to run (read the third workshop for more details).
An action should be used only when you want it to control an entity; use functions when you don't have to deal with entities (for example, when you are adding numbers, like in my example above).
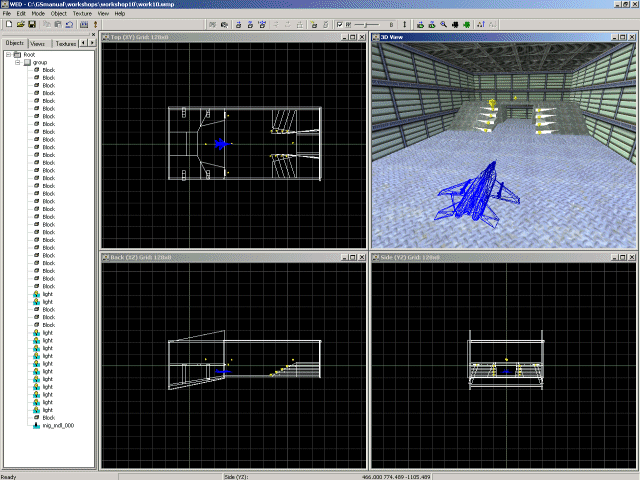
Ready for action? Start WED and open the level named work10:
Let's run the level right away:
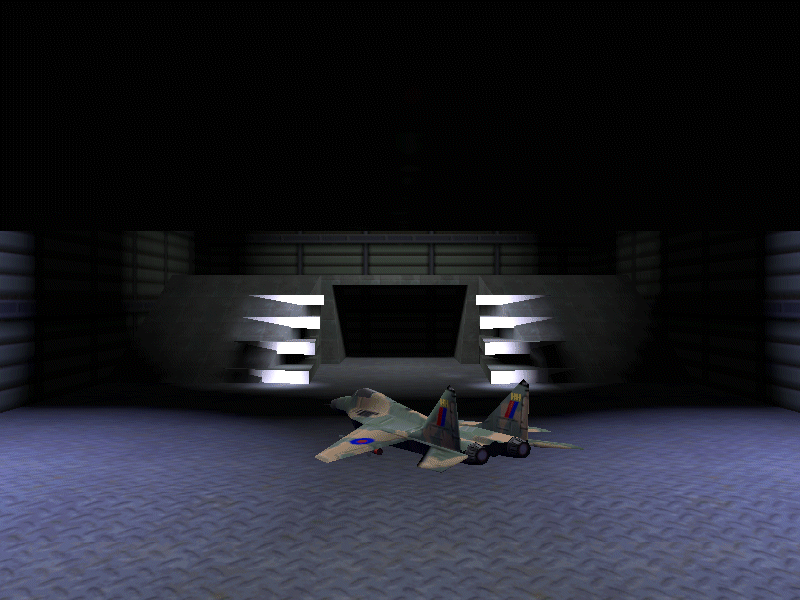
The plane is rotating! If you have studied the 8th workshop (Position, angle and scale) you know that the plane is changing its pan angle continuously.
Time to see the script associated to the level so fire up SED and open script10:
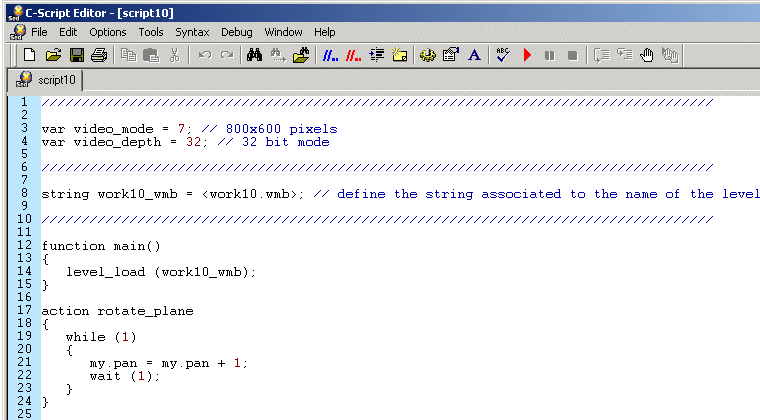
Have you noticed that these scripts become shorter and shorter as we learn more things? Maybe the last workshop will contain a single line of code, who knows...
Most of the code should be easy to understand because we went through it several times; we will concentrate on the code used by the plane. We have created an action named rotate_plane so its name will appear in WED's action list. But what's with this action list and where can I take a look at it? Switch to WED, select the plane model in the top view, right click it and choose Properties:
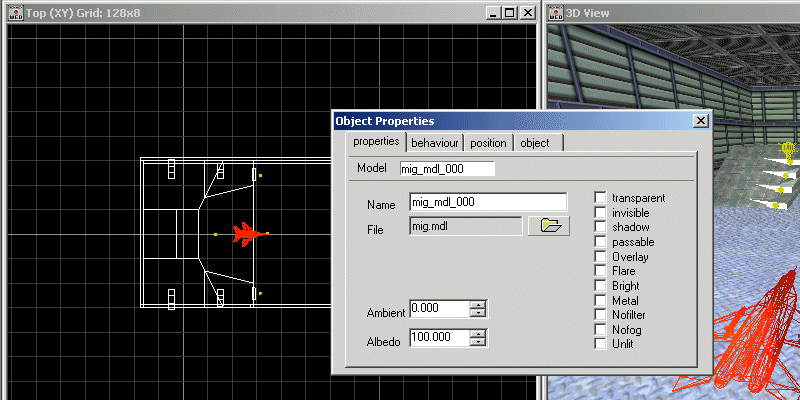
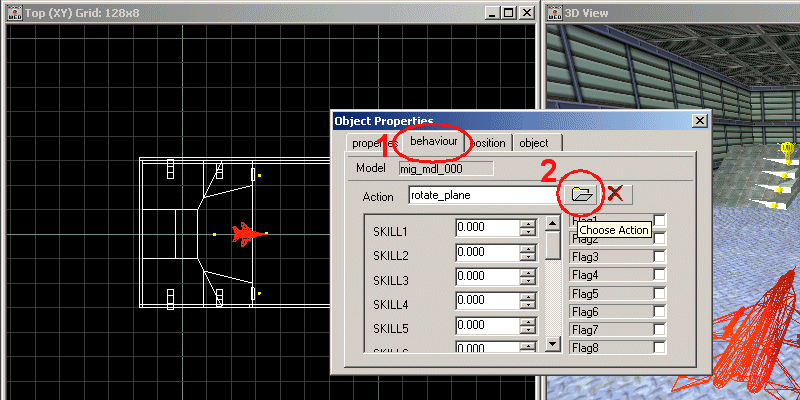
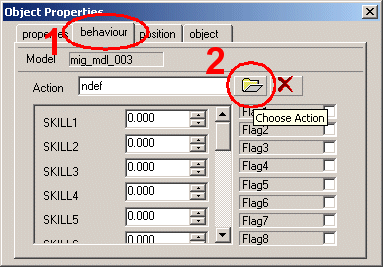
Click "Behaviour" and then "Choose Action":
You will see the "Choose Action" window which allows us to select one of the actions that were created in our script:
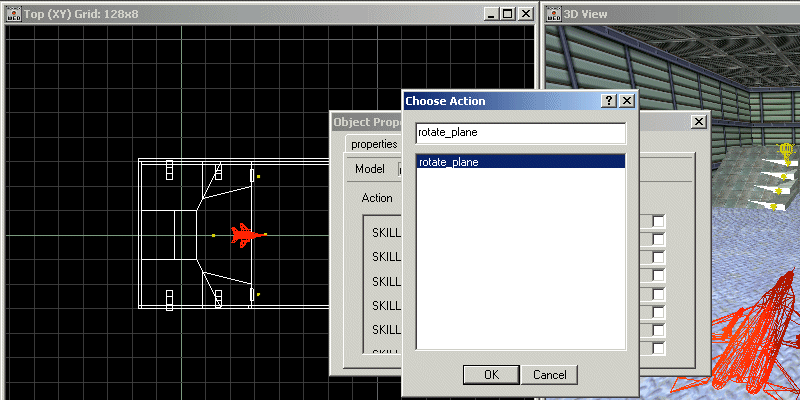
We have a single action named rotate_planeso its name is the only one that appears in the Choose Action list. Let's get back to the code:
action rotate_plane()
{
while (1)
{
my.pan = my.pan + 1;
wait (1);
}
}
Some of the actions or functions in our games need to run for a bigger period of time - some of them might need to run from the moment we start the game until we shut it down! If you want to create a game that looks and play like Minesweeper, you have to make sure that you can move the mouse all the time, otherwise you will be unable to click the squares, not to mention that you will not be able to end the game by clicking the "x" in the upper right corner of the window. All the functions and actions we've studied so far do their job well but they aren't running all the time; they execute something and then they stop running. The plane that was used as an example in this workshop rotates all the time, so we must use some sort of instruction that keeps an action running forever.
We need to learn how to work with something new: the while (1) loop. What is a loop? It's nothing more than a piece of code that repeats the set of instructions placed between a pair of curly brackets; a typical while loop definition looks like this:
while (some condition is true)
{
// repeat the instructions
that are placed inside the curly brackets
}
The action above uses while (1); that's the short form for "as long as 1 = 1", which means that the loop will run forever. You have to use a while (1) loop whenever you need an action that must run continuously, be it a player, an elevator, an enemy, etc. Ok, so the first line inside the action named rotate_plane tells the entity to repeat what's inside the while loop forever, but what's inside the while loop? What does this loop repeat forever? Only two lines of code:
my.pan = my.pan + 1;
wait (1);
The first line of code adds 1 degree to the pan angle of the plane. The plane starts with an initial pan angle of 0 degrees and then its pan will be set to 1, 2, 3, .... degrees, so the plane will rotate around its pan angle.
But what's with that "wait (1);" instruction? This instructs the engine to wait exactly one frame, and then continue after the wait. That is, repeating the loop. So we can be sure that the code within the while loop is executed once every frame - no more, no less. We'll encounter loops executed once per frame very, very often in our future game developer career.
Let me ask you something in that context: have you ever heard about multitasking? It is the ability to run several programs at the same time. Right now you are reading this workshop, maybe you are listening some music on the same pc, from time to time you run the engine on the same pc, maybe you have an antivirus that sits in the system tray... all these programs appear to run at the same time because the computer switches from one task (program) to the other very quickly, making you believe that all the applications run at the same time.
The same thing happens with the while loops; they need to allow the rest of the actions and functions in your game to run. A while loop that doesn't pause from time to time will eat all the computer resources because it wants to repeat what's inside the loop over and over; even the clock that appears in the system tray in windows will be unable to update the time if you have created a while loop that doesn't stop at all!
So how do we pause a while loop? This is just done by the "wait (1);"; this small line of code allows all the other actions and functions to run their own code.
Let us discuss a little about frames and frame rates. What you see on your monitor when you play a game is nothing more than a series of still images (pictures, frames) that are displayed one after the other. If your PC can display 50 pictures a seconds, it runs the game at 50 frames per second. The frame rate in this case would be 50 frames per second (50 fps). A wait (1) instruction will tell the function or action that contains it to stop running while the PC is displaying any of those 50 pictures, every second.
Important tip
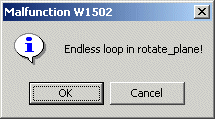
Every while (1) loop must include an instruction
that interrupts it, normally using a wait (1); instruction. If you forget
to add a wait instruction inside the while loop, the engine
will give an error message that looks like this:
Read the reference manual to learn more about "wait".
Let's create a fresh action; copy and paste the code below at the end of your script10 file:
action change_roll
{
while (1)
{
my.roll = my.roll + 1;
wait (1);
}
}
The resulting script should look like the one in the picture below:
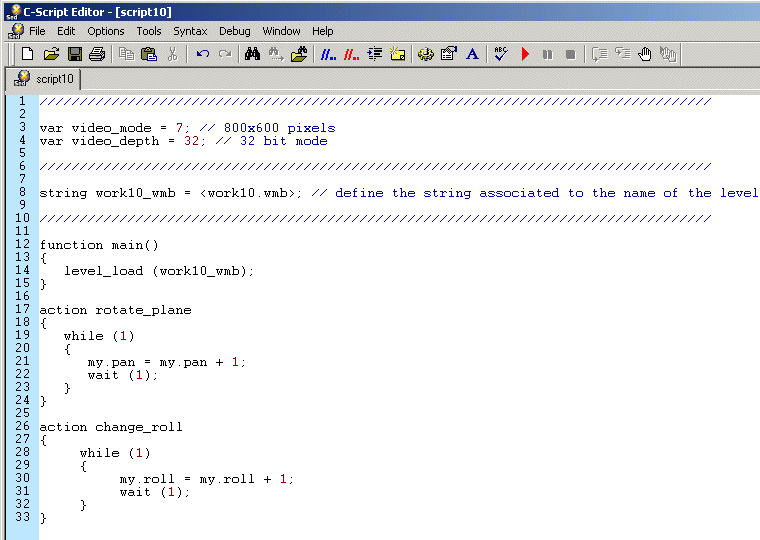
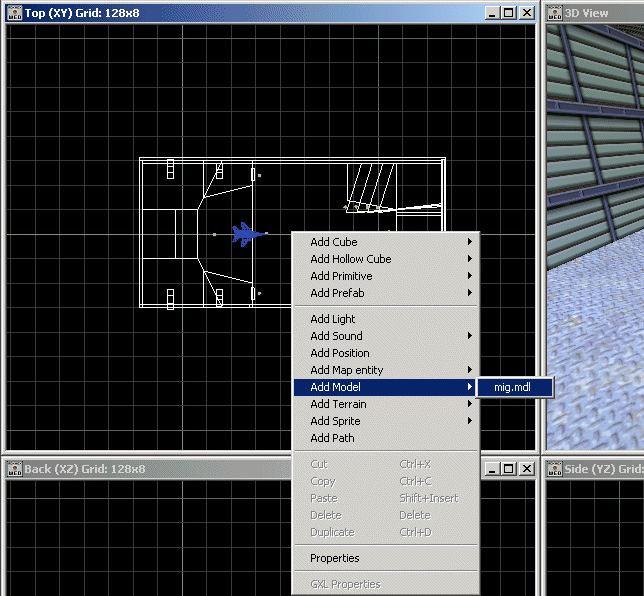
Save the script, switch to WED, right click the top view and add a new mig model as shown below:
Make sure that the new model can be seen easily; choose a proper position for it. Oh, you don't know how to do that?
The camera (our view inside the 3D world) can be controlled using C-Script instructions, but for the sake of simplicity I'm not going to write code for the camera until you learn a few more things. The camera is on its own; what happens when we allow that to happen? Well, it chooses to appear in the origin.
x = 0
y = 0
z = 0
Take a look at the picture below to see the camera position in WED:
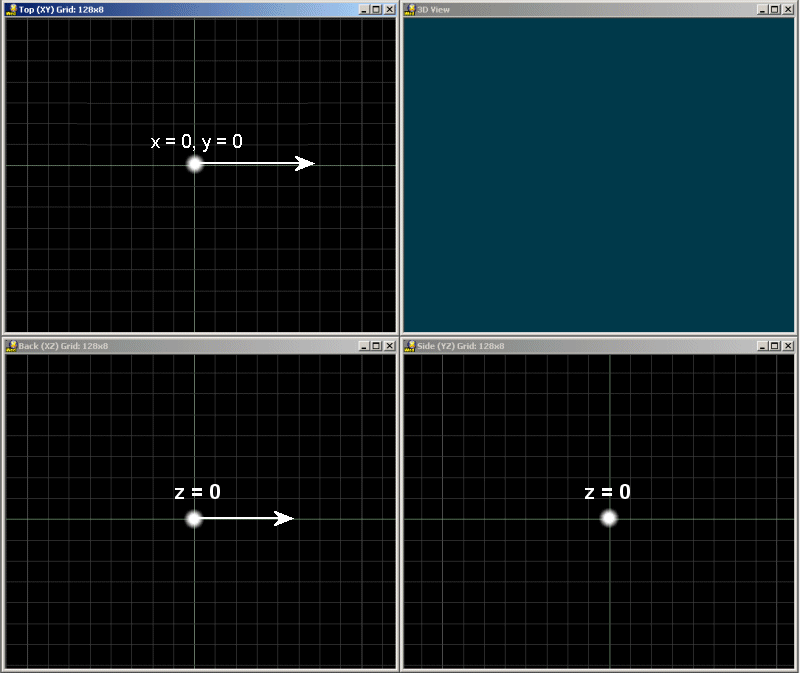
The camera is looking to the right so if I want to place a new visible object inside the level its x must be bigger than zero. Take a look at the initial picture (with a single mig model) to see how I chose the position for the first plane:
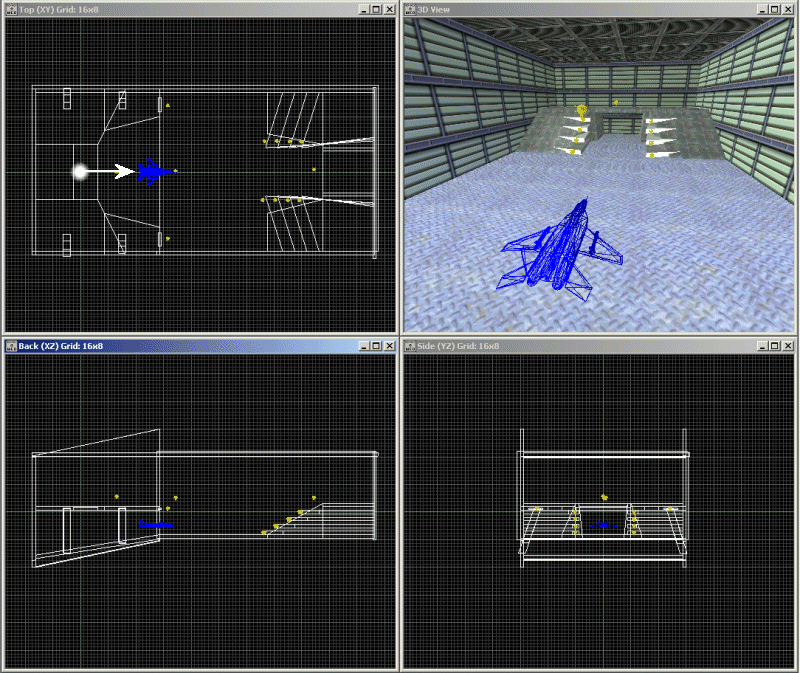
Take a look at the top view; it is pretty clear that the player will be able to see the plane model when the level is run. If you have set the proper position in WED's top view the only thing you need to care about is the height of the plane which can be set in the back or side view. I encourage you to add the second mig model as shown below:
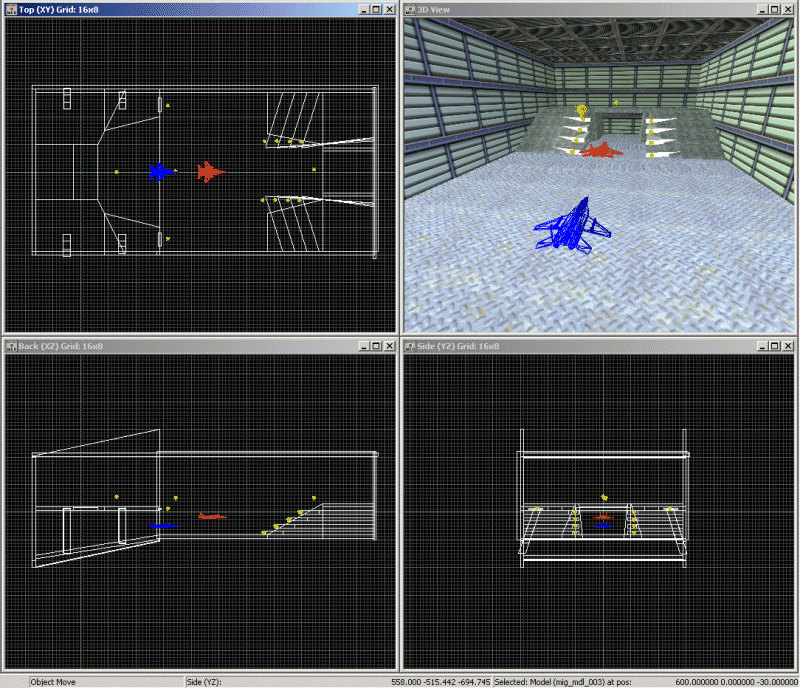
The second plane model (the red one) has a bigger x and a slightly bigger z than the first model; if you can't place it properly right click it and choose these values for its x, y and z:
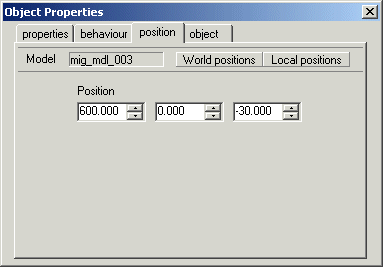
Click World positions if you need to; these are the coordinates for the "real" 3D world. Now click the Behavior Tab in the Object Properties window shown in the picture above and then click the Choose Action button:
You will see the two actions inside the list:
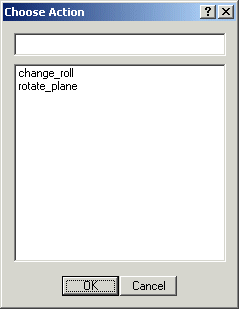
(If the action named change_roll doesn't appear in your action list you have forgotten to save the modified script file. Save it now and then load the level named work10 again)
Click change_roll, press OK and give yourself a big hug: you've just assigned the new action to the second mig model. The name of the action is now change_roll:
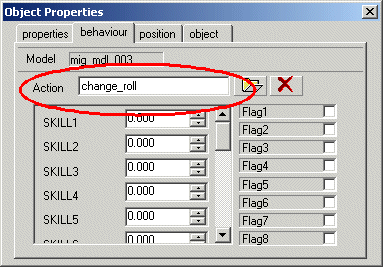
Close the "Object properties" window, save the level, build, run and you will see the following image:
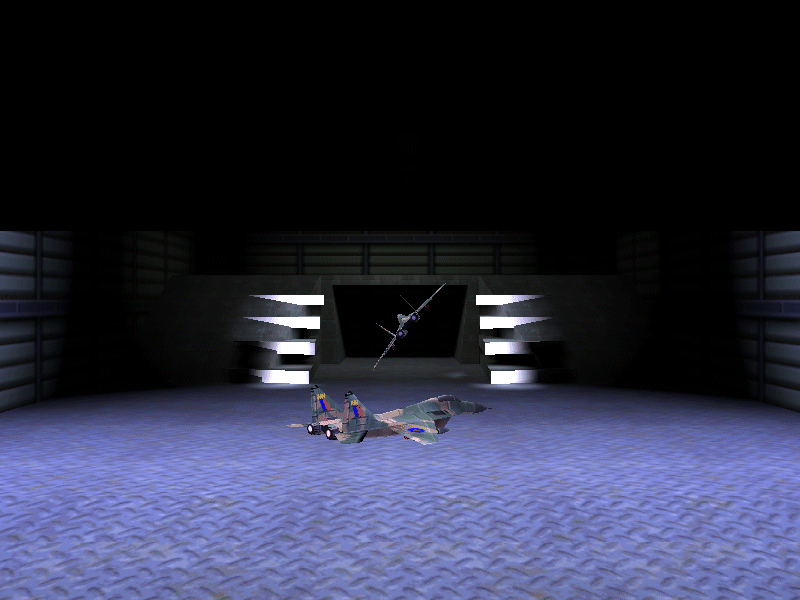
So that's how the roll angle works! You can move the planes to the left or to the right in WED if you don't like their position; change their x and y in WED's top view and set a different height (z) using the back or the side view.
I encourage you to add the third plane model and a new action that changes its tilt angle in a while loop. Don't read the solution below - I'm watching you!
Solution: add a new action at the end of the script file and attach it to the third plane model:
action change_tilt
{
while (1)
{
my.tilt = my.tilt + 1;
wait (1);
}
}