If you don't like to write code at all you will be happy to hear that this workshop will teach us useful things without us having to write a single line of script. We will learn quite a few things about the position of the objects in the 3D world, their angles and scale.
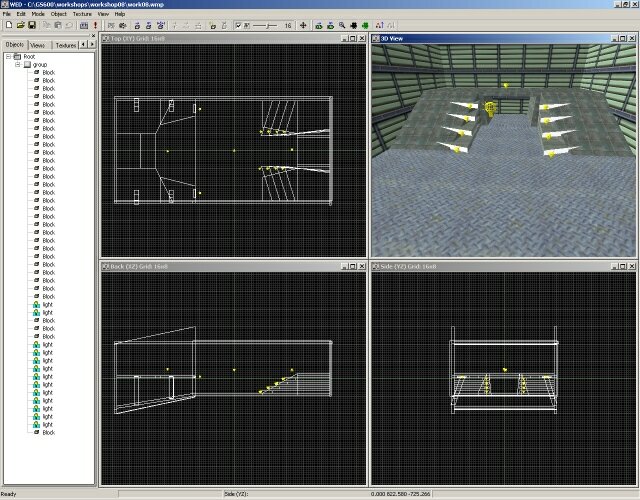
Start WED and open the level inside the \workshop08 folder:
You can see a decent looking room. I bet it looks better if we run the level so let's do it: Build the level and Run it.
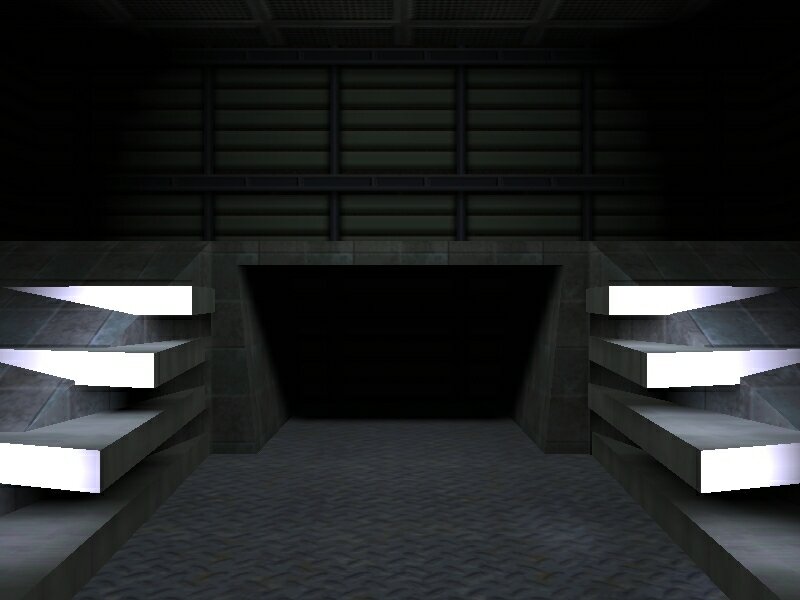
I would say that it doesn't look too bad. Can I see more of it, please?
I have told you that if you don't write some code to change the position of the camera (our "window" inside the 3D world) the engine will place it in the origin every time you run a level. Keep the level running and press the F11 key - you will see a lot of figures on the screen but we will discuss only a few of them:

The two columns (xyz and ang) show the
position of the camera and its angles
(Tip: in newer engine
versions the display will look a little different and the position and angles
have moved to the first column).
Press the 0 key
to free the camera, then move it using the arrow keys and the mouse. I have moved
the camera a little and here's what I have got:
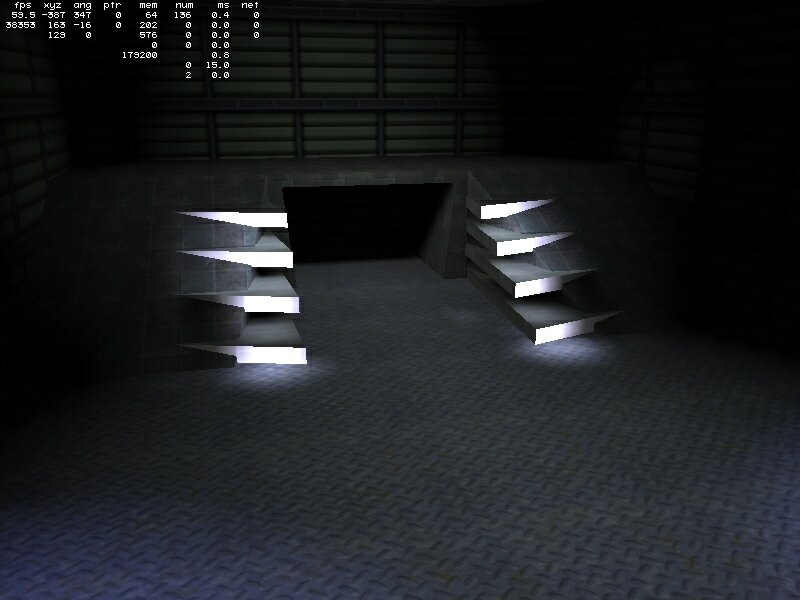
I like this camera position better, because I can see a bigger part of the level. Five values out of six have changed for the "xyz" and "ang" columns; it is clear that the camera has changed its xyz position and two of its angles.
How can we set up a certain position for a certain object? Take a look at the screenshot below:
We can set x and y for any object by changing its position in the Top (XY) view and we can change the height (z) of the object by changing its position in the Back (XZ) or Side (YZ) view. Of course that you have two possibilities to change x, y and z (take a look at the picture above) but I think that you should use the method I've mentioned.
Right click one of the level blocks in WED, choose Properties then Position and you will see the following image:
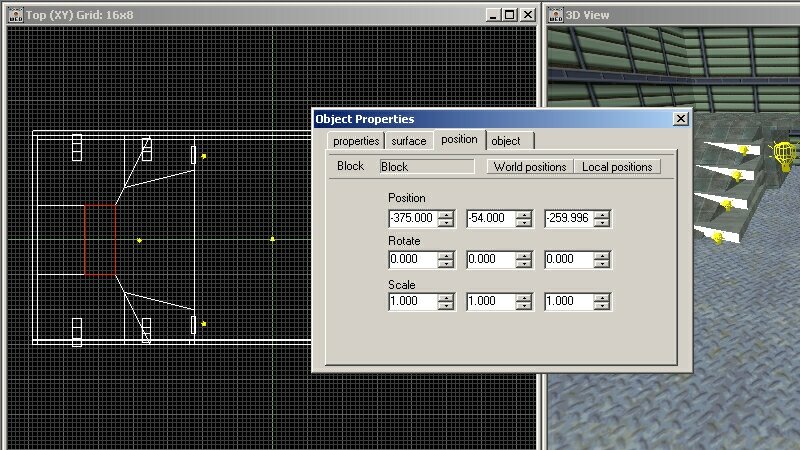
The first row gives the coordinates for the level block on x (-375), y (-54) and z (-259.996). Change one of these values and you will see that the selected block (the red rectangle in the image above) will change its position; this way you can use WED to set any object to a certain position in the level.
Tip: You can also change the x coordinates for your objects in WED's "Back" view and the y coordinates in "Side" view.
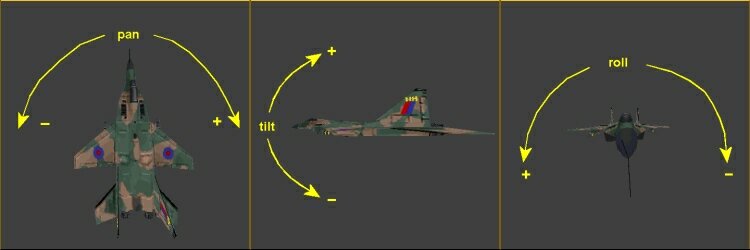
The second row in the Object Properties window - Rotate - gives the angle of the selected object. What's with these three angles? Their names are pan, tilt and roll and they are Euler angles; if you don't know what that is here's a picture that should clear the fog:
I shouldn't let you play with a big plane in such a small room but Anakin Skywalker did it so why can't we do it? Right click the top view in WED, choose Add Model and then click mig.mdl:
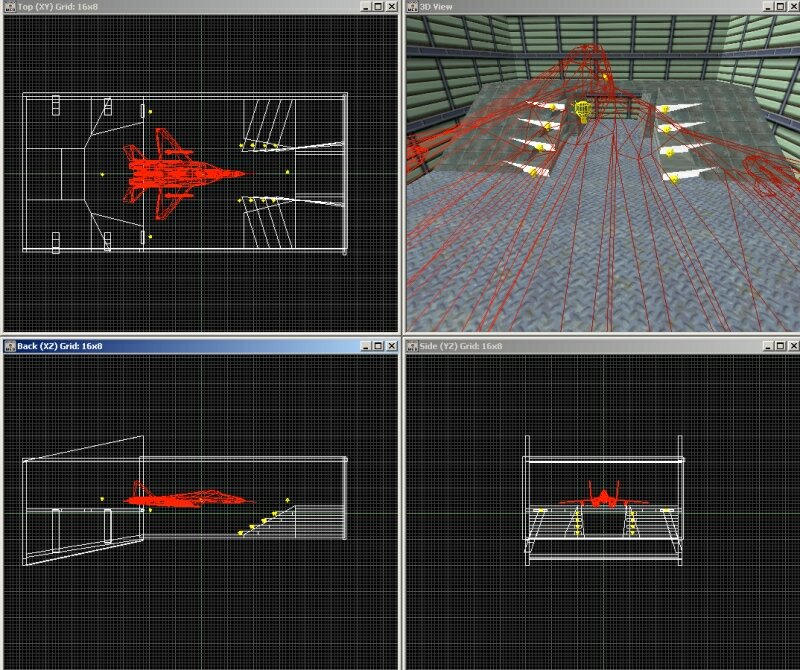
I have told you that this is a big plane in a small room, haven't I? Don't worry, you don't need to fly it; try to place the plane close to the center of the room, like in my picture and then right click it, choose Properties / Position and play with the three Rotate values to change its angles. You will notice that when we place a model in the level, the level editor will give it an initial pan angle of 90 degrees. Make sure that you learn how pan, tilt and roll work because we will use them a lot in our future workshops.
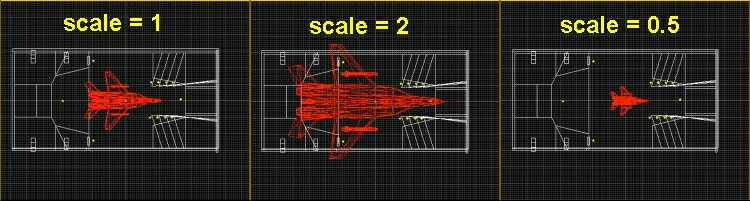
The last row of values in Object Properties is Scale, the scale (the size) of the object. Right click the plane model and scale it using values bigger than 1 to increase its size or values smaller than 1 to decrease its size.
Let's get back to our test level; the script08 file that runs the level has only a few lines of code:
///////////////////////////////////
var video_mode = 7;

///////////////////////////////////
function main()
{
	level_load ("work08.wmb");
}
What are you saying? I promised that we won't write a single line of code? Ok, let's stop here.